Homemade Pickled Garlic: A Tangy Twist to Preserve Freshness
Are you a devoted garlic enthusiast constantly seeking innovative ways to enjoy and extend the life of your beloved pungent cloves? Look no further than the art of pickling! Homemade pickled garlic transforms fresh cloves into a vibrant, tangy, and remarkably versatile ingredient that can elevate countless dishes. Far from merely a preservation technique, pickling also enhances garlic’s complex flavor profile, making it a staple you’ll want to keep on hand.
This comprehensive guide will walk you through how to make pickled garlic at home, ensuring you achieve delicious results every time. We'll delve into everything from selecting the freshest cloves to crafting the perfect brine and safely storing your creations, offering tips and insights to make your pickling journey a resounding success.
Why Pickle Garlic? Beyond Simple Preservation
Pickling isn't just for cucumbers. It's an ancient and effective method for preserving a wide array of fresh produce, from crisp onions and vibrant beets to succulent peaches. When it comes to garlic, pickling offers several compelling advantages:
- Extended Shelf Life: One of the primary benefits of pickling garlic is its significantly extended shelf life. Properly prepared and stored pickled garlic can last for several months in the refrigerator, allowing you to enjoy fresh garlic flavor long after the harvest season.
- Enhanced Flavor Profile: The magic of pickling lies in the brine. The vinegar and spices transform raw garlic’s sharp, sometimes overpowering bite into a mellow, tangy, and slightly sweet flavor. This makes pickled garlic more palatable raw and a fantastic complement to a broader range of dishes.
- Versatility in the Kitchen: Pickled garlic is incredibly versatile. It can be chopped and added to salads, sandwiches, pasta dishes, and marinades. Whole cloves are perfect for charcuterie boards, antipasto platters, or as a unique garnish for roasted meats and vegetables. Its softened texture and balanced flavor make it an excellent substitute for raw garlic in many recipes.
- Digestibility: While not a probiotic fermentation (like kimchi or sauerkraut), the acidic environment of the pickling brine can help break down some of garlic's compounds, potentially making it easier for some people to digest compared to raw garlic.
If you're looking for more specific recipes, check out our Easy Pickled Garlic Recipe: Step-by-Step Guide to Tangy Cloves for a quick start!
Gathering Your Essentials: Choosing Garlic & Supplies
The foundation of exceptional pickled garlic begins with selecting the right ingredients and having the necessary tools at hand. Quality matters, so pay close attention to your garlic choice.
Selecting the Freshest Garlic
To make the best pickled garlic, always opt for the freshest garlic you can find. Look for:
- Firm Cloves: Gently squeeze the garlic head. It should feel firm and solid, without any soft spots or give.
- Intact Skin: The papery skin should be tight and free from excessive bruising, mold, or blemishes.
- Absence of Sprouts: Avoid garlic that has green sprouts emerging from the cloves, as this indicates older garlic which may have a slightly bitter taste.
- Uniform Size: While not strictly essential, selecting cloves that are relatively uniform in size will ensure they pickle evenly and pack neatly into your jars.
Essential Ingredients and Equipment
Here’s what you’ll need to embark on your pickling adventure:
Ingredients:
- Fresh Garlic: Enough to fill your jars.
- Vinegar: The backbone of your brine. White vinegar, apple cider vinegar, or even red wine vinegar can be used. White vinegar offers a clean, crisp flavor, while apple cider vinegar adds a subtle fruitiness.
- Water: To dilute the vinegar and create a balanced brine.
- Pickling Salt: Crucial for preservation and flavor. Avoid iodized table salt, which can cloud your brine.
- Sugar: A small amount balances the acidity of the vinegar and enhances the overall flavor.
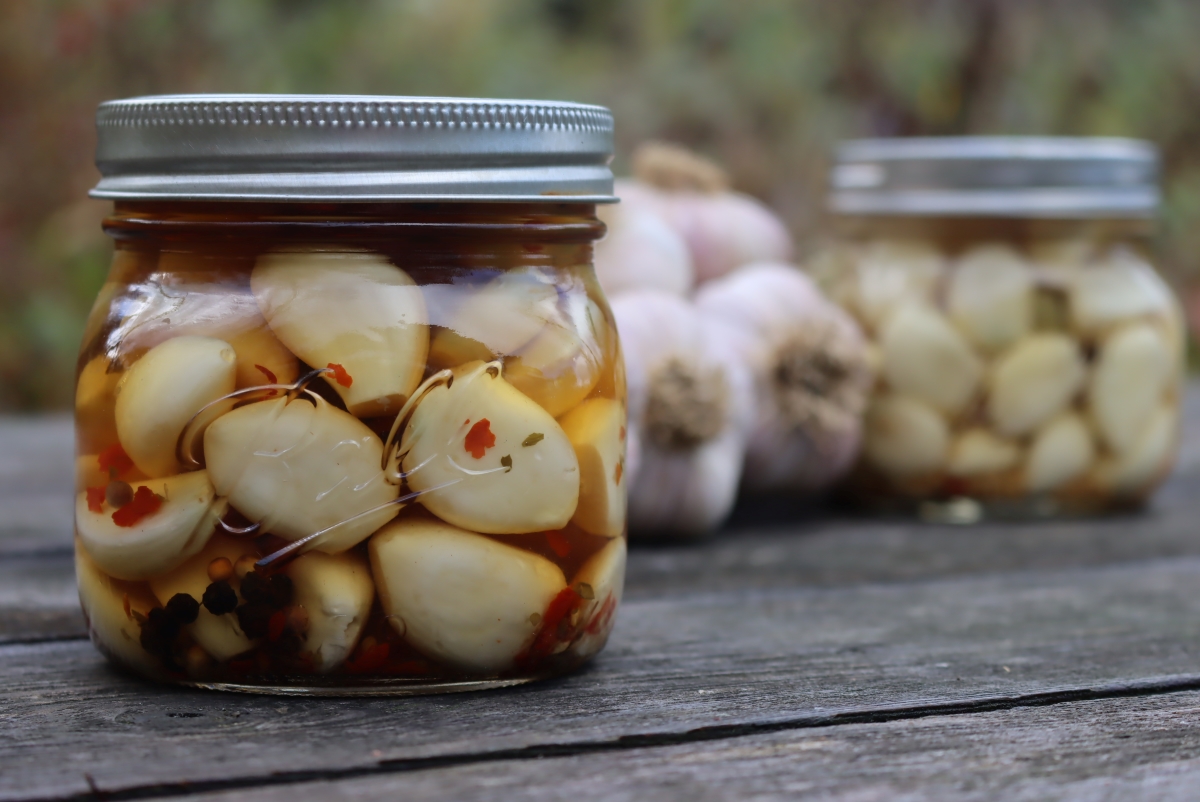
- Spices (Optional but Recommended): This is where you can truly customize your pickled garlic! Consider black peppercorns, bay leaves, dill weed, mustard seeds, red pepper flakes for a kick, or fresh herbs like thyme and oregano.
Equipment:
- Glass Jars with Tight-Fitting Lids: Mason jars are ideal. Ensure they are clean and free from cracks.
- Cutting Board & Sharp Knife: For peeling and prepping.
- Measuring Spoons & Cups: For precise brine ingredient ratios.
- Medium Pot: For preparing the brine.
- Funnel: To easily pour brine into jars without spills.
- Ladle: For transferring hot brine.
- Garlic Peeler (Optional): A silicone garlic peeler can save a lot of time and effort!
Mastering the Pickling Process: A Step-by-Step Guide
Now, let's get to the heart of how to make pickled garlic. Follow these steps carefully for optimal results.
1. Peel and Prepare the Garlic
- Separate Cloves: Break the garlic heads into individual cloves.
- Peel: This can be the most time-consuming step. Use a small sharp knife to trim the root end and carefully peel away the skin. Alternatively, try placing cloves in a bowl, covering with another bowl of the same size, and shaking vigorously for 30-60 seconds to loosen skins. A silicone garlic peeler also works wonders.
- Soak (Optional but Recommended): Place your peeled garlic cloves in a bowl of cold water for about an hour. This helps to soften them slightly, ensures any residual dirt is removed, and can reduce some of the raw garlic's sharpness.
- Blanch (Optional but Recommended): For an even milder flavor and slightly softer texture, you can blanch the peeled cloves. Briefly submerge them in boiling water for 30 seconds, then immediately transfer to an ice bath to stop the cooking process. This can also help prevent the garlic from turning blue or green later (a harmless natural reaction).
- Pat Dry: After soaking or blanching, drain the cloves thoroughly and pat them completely dry with a paper towel. Any excess water can dilute your brine.
2. Sterilize the Jars
Sterilization is a non-negotiable step to prevent bacterial contamination, which can lead to spoilage and potential health risks. Do not skip this!
- Wash Thoroughly: Wash your glass jars and lids with warm, soapy water. Rinse them completely.
- Oven Sterilization: Place the clean glass jars (without lids) upside down on a clean baking sheet lined with parchment paper. Bake in a preheated oven at 120°C (250°F) for at least 15-20 minutes. Keep them in the warm oven until ready to fill.
- Boiling Water Sterilization: Alternatively, submerge jars in a large pot of boiling water for 10 minutes. Remove carefully with tongs, draining well, and place on a clean towel to air dry, or keep warm until ready to use.
- Lids: Lids should be simmered (not boiled vigorously) in hot water for a few minutes just before use to soften the sealing compound.
3. Prepare the Brine Solution
The brine is where the magic happens, infusing your garlic with that characteristic tangy flavor.
- Combine Liquids: In a medium pot, combine 2 cups of your chosen vinegar (white, apple cider, or red wine) with 2 cups of water.
- Add Seasoning: Stir in 1 tablespoon of pickling salt and 1 teaspoon of granulated sugar.
- Introduce Spices: If desired, add your chosen spices to the pot now. Popular options include 1 teaspoon of whole black peppercorns, 1-2 bay leaves, a pinch of dill weed, or a few dried chili flakes. Experiment to find your favorite combinations!
- Heat Gently: Heat the mixture over medium heat, stirring occasionally, until the salt and sugar are completely dissolved. Do not bring the brine to a rolling boil; just heat it enough to dissolve the solids.
- Cool Slightly: Allow the brine to cool slightly before pouring it over the garlic. While some recipes suggest pouring hot brine, cooling it slightly can help maintain the garlic's crispness.
4. Pack the Jars & Seal
- Fill Jars: Carefully transfer the prepared garlic cloves into your warm, sterilized jars. Pack them snugly but don't jam them in, leaving about ½ inch of headspace from the rim. If using fresh herbs like dill sprigs or thyme, add them to the jars with the garlic.
- Pour Brine: Using a funnel and ladle, carefully pour the cooled (or slightly warm) brine over the garlic cloves, ensuring they are completely submerged. Leave ½ inch of headspace.
- Remove Air Bubbles: Gently tap the jars on your counter or use a clean, non-metallic utensil (like a chopstick) to dislodge any trapped air bubbles. Top off with more brine if necessary to maintain the headspace.
- Seal: Wipe the rims of the jars clean with a damp paper towel. Place the sterilized lids on top, and then screw on the bands until finger-tight.
Tips for Success & Flavor Variations
- Patience is Key: While your pickled garlic is technically ready after a day, the flavors truly meld and deepen over time. For the best taste, allow your pickled garlic to sit in the refrigerator for at least 1-2 weeks before enjoying.
- Storage: Store your sealed jars of pickled garlic in the refrigerator. They will last for several months. Always use clean utensils when retrieving garlic to prevent contamination.
- The "Blue Garlic" Phenomenon: Don't be alarmed if your garlic turns blue or green! This is a natural and harmless chemical reaction that can occur when compounds in garlic (sulfur compounds) react with acids (vinegar) and trace minerals (often present in water, or even stainless steel pots). The garlic is still perfectly safe and delicious to eat. Blanching can sometimes help reduce this, but it's not a guarantee.
- Experiment with Spices: This is where you can truly make your pickled garlic unique!
- For a Mediterranean twist: Add oregano, bay leaves, and a few coriander seeds.
- For a spicy kick: Include dried red chili flakes or a small whole dried chili pepper.
- For an aromatic blend: Try star anise, cloves, or a cinnamon stick (use sparingly).
- For freshness: Add a sprig of fresh dill or thyme to each jar.
- Explore Vinegar Options: While white vinegar is classic, experimenting with apple cider vinegar can add a subtle sweetness and fruity note. For more robust flavors, some people use red wine vinegar, though it will tint the garlic.
To dive deeper into advanced techniques and more intricate recipes, our guide Master Pickled Garlic: Your Guide to Flavorful & Long-Lasting Cloves offers even more insights!
Culinary Uses for Your Homemade Pickled Garlic
Once you’ve successfully mastered how to make pickled garlic, you’ll find endless ways to incorporate it into your cooking:
- Antipasto & Charcuterie Boards: Serve whole cloves as a zesty addition.
- Salads & Dressings: Mince the cloves and add them to vinaigrettes, or toss whole with leafy greens.
- Sandwiches & Wraps: Add a tangy bite to deli sandwiches, hummus wraps, or even grilled cheese.
- Pasta Dishes: Chop and stir into olive oil and garlic pasta, or add to creamy sauces for an extra layer of flavor.
- Marinades: The pickled cloves themselves, and even the brine, can tenderize and flavor meats or vegetables.
- Garnish: Use whole or sliced cloves as a garnish for roasted chicken, fish, or vegetable dishes.
- Snack: Don't underestimate the simple pleasure of eating a pickled garlic clove straight from the jar!
Conclusion
Making homemade pickled garlic is a rewarding endeavor that not only helps you preserve an abundant ingredient but also unlocks a new dimension of flavor. With just a few basic ingredients and a clear step-by-step process, you can transform fresh garlic into a versatile, tangy, and delectable condiment that will elevate your culinary creations for months to come. So, gather your supplies, follow these instructions, and get ready to savor the delightful taste of your very own homemade pickled garlic!
